Pre-Colored Images for Easy Cards
December 20, 2019 12 Comments

Hey crafty friends, it's Amanda from Pear Blossom Press again. Have you played with the new Mine Workers set yet? I stamped out all seven of these cuties several times and colored them one night while I was binge watching TV. Then, I cut them out with my ScanNCut to have them ready for cards.
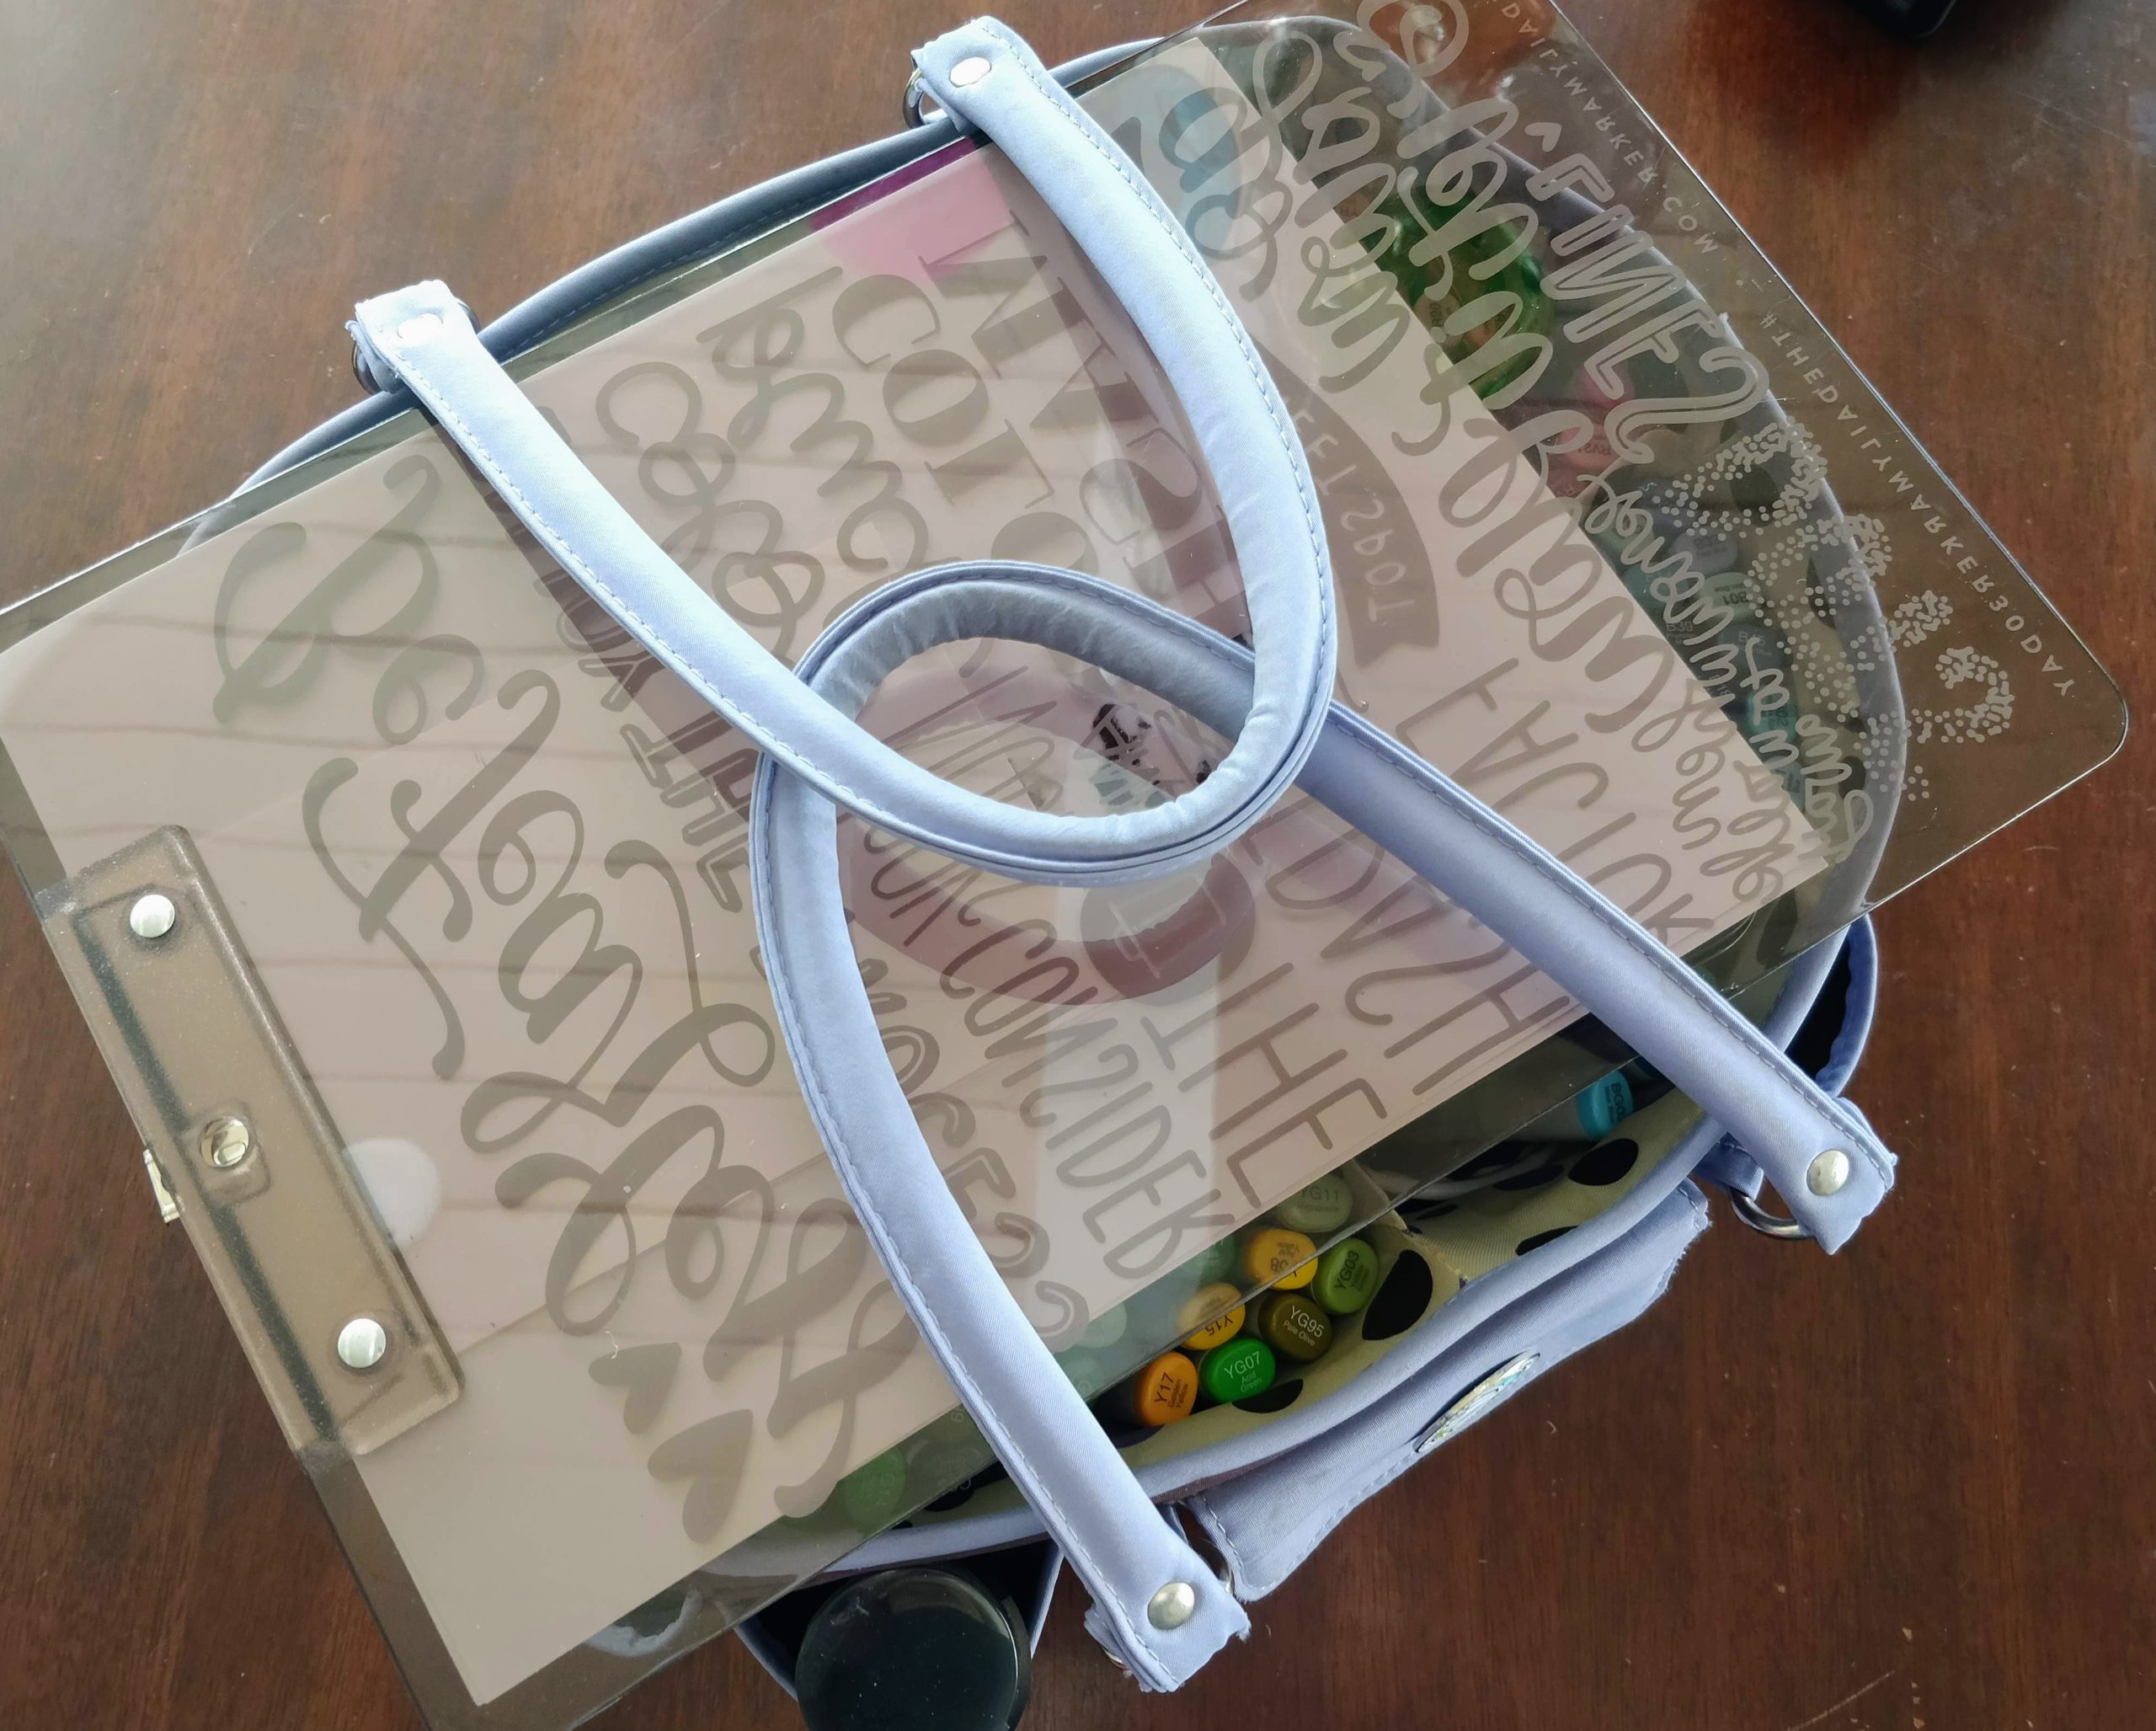
Do you color images in advance, or as you need them? I really like coloring separately from actual cardmaking. It is a different creative process for me. I find it relaxing and it gives me something to do in my down time. It's also easy to take coloring supplies on the road when I travel. Especially, if I pre-stamp my images and then just take a clipboard, markers, colored pencils, and a sharpener. Plus, I don't have to worry about taking all of the tools needed to create a complete card; just coloring essentials.
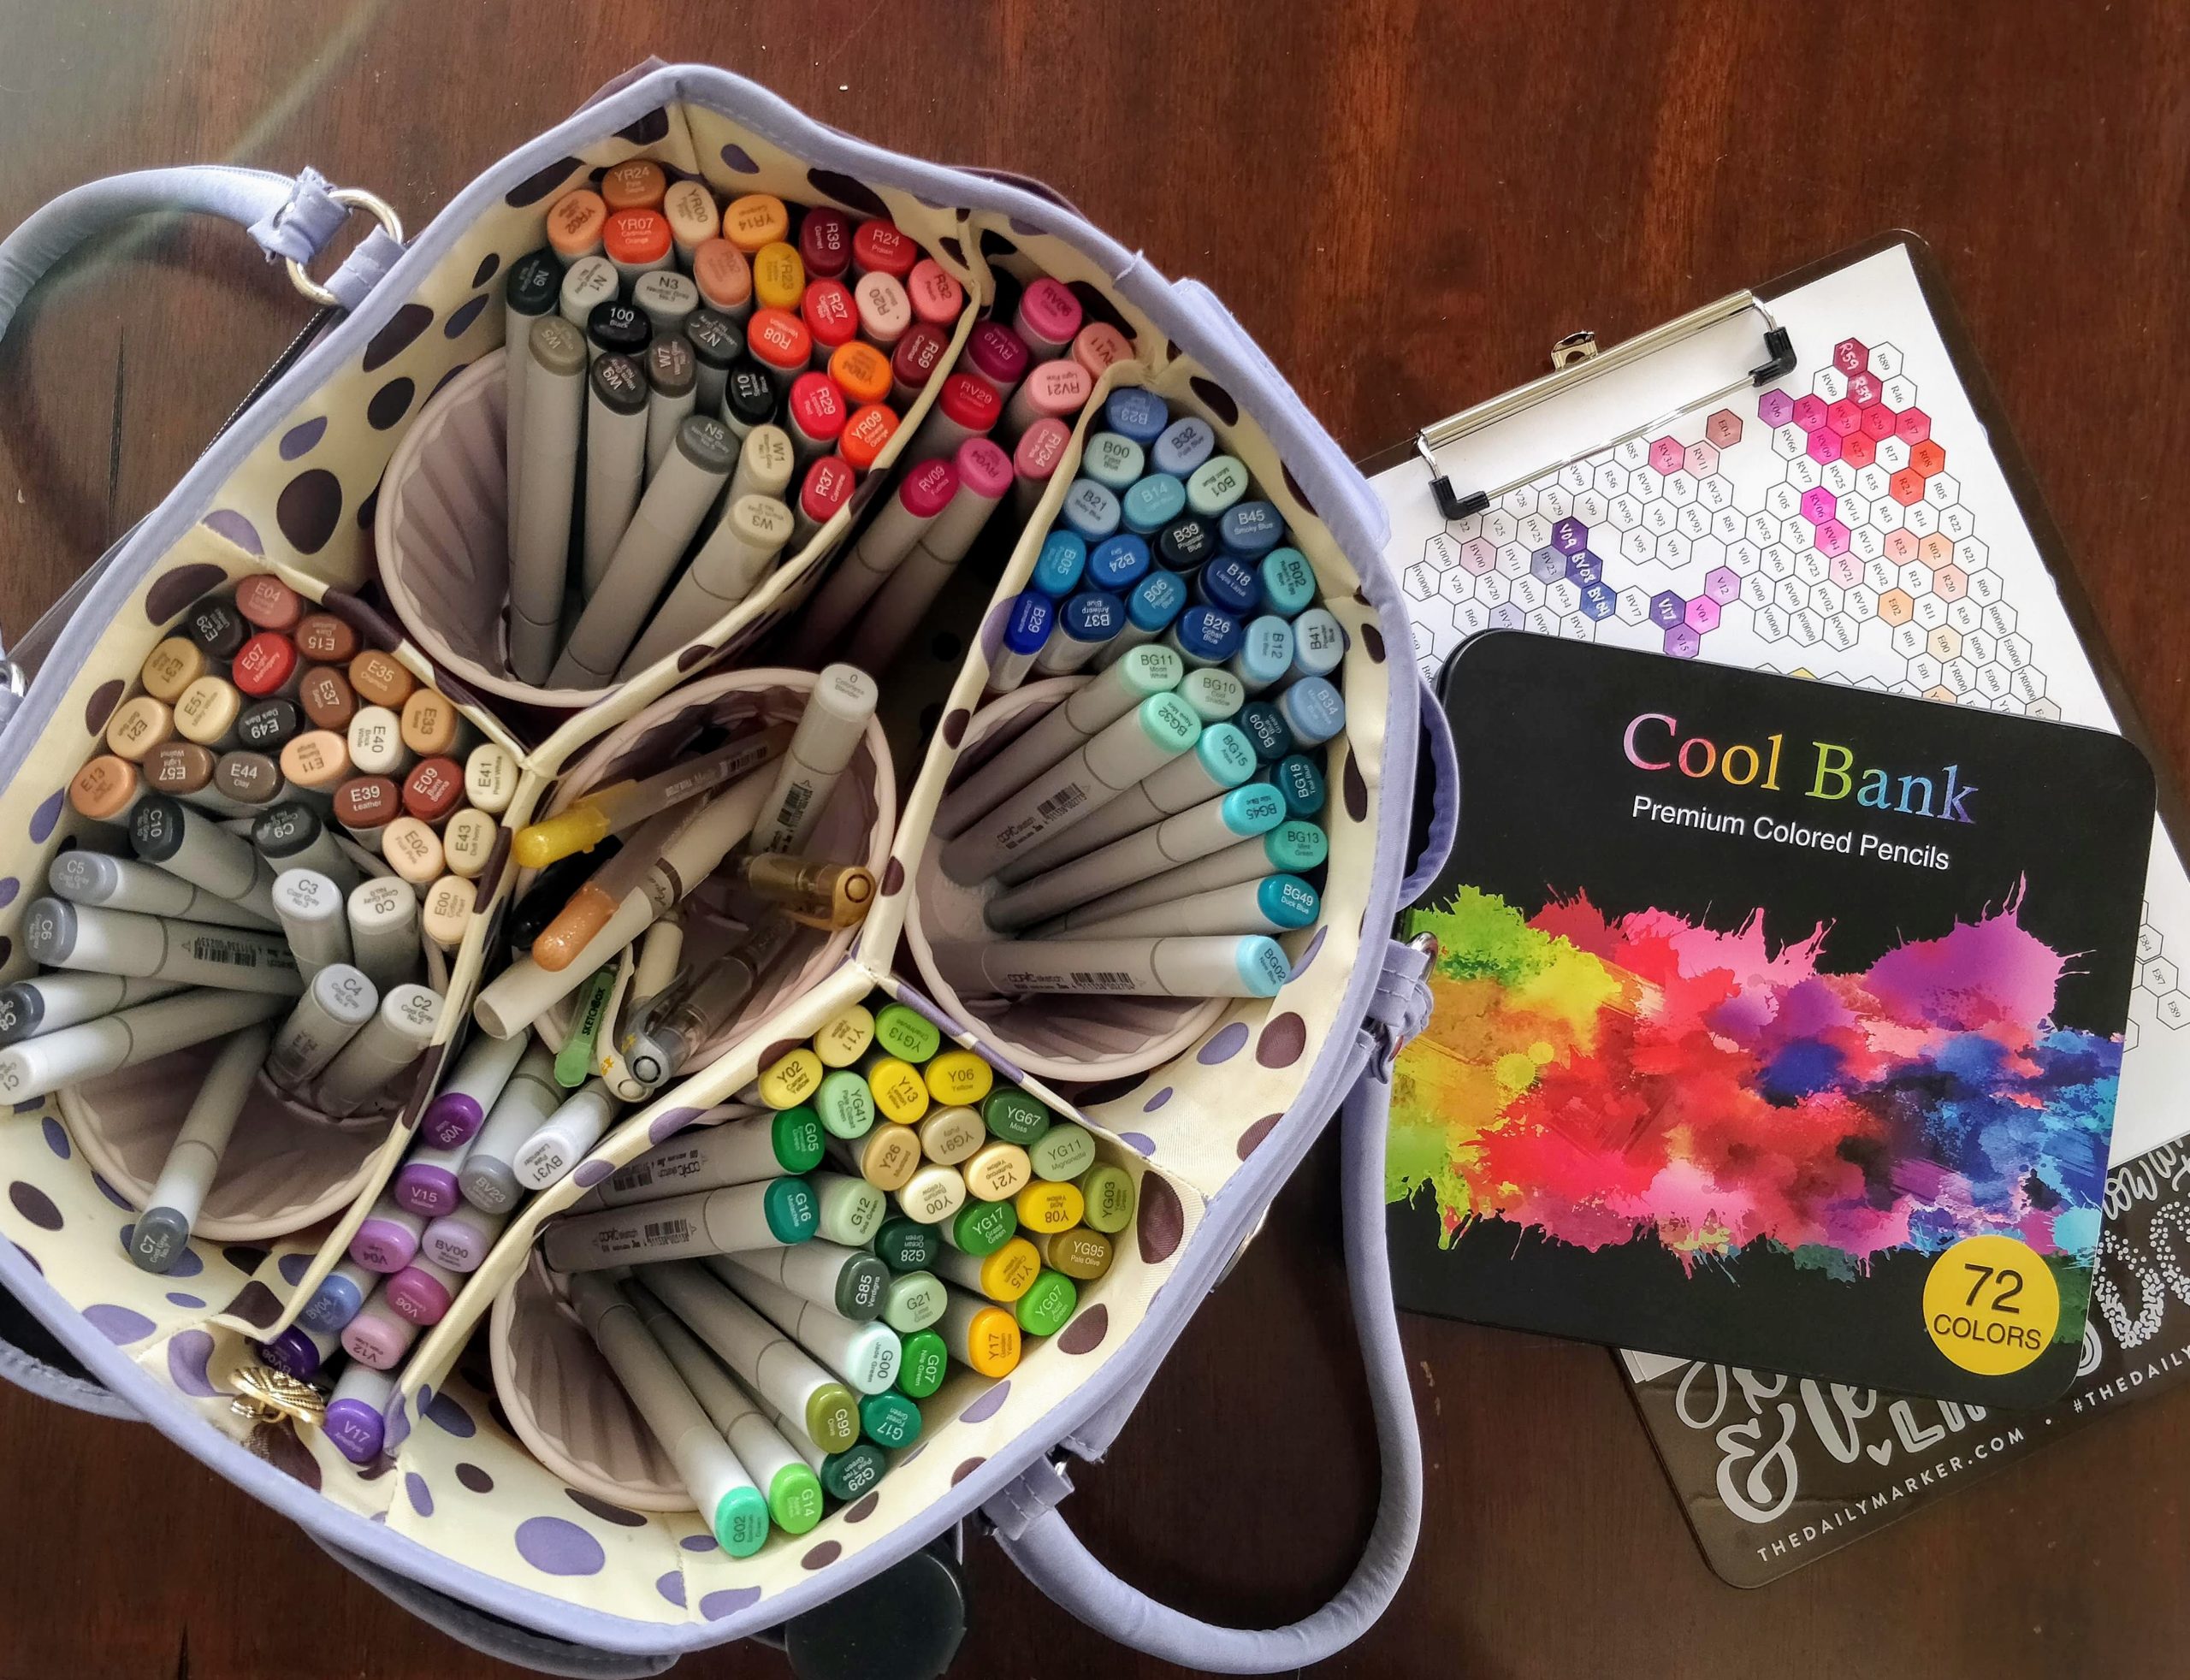
I have moved all of my Copic markers to a craft tote with dividers (I added plastic cups to be additional dividers). I don't sort my colors by specific number, I sort by color families; it's easy to find and replace the markers that way. I can stack my pencils and clipboard on top of the tote and carry it to the couch, the car, or even an airplane. There are probably fancier solutions, but this is working nicely for me now.
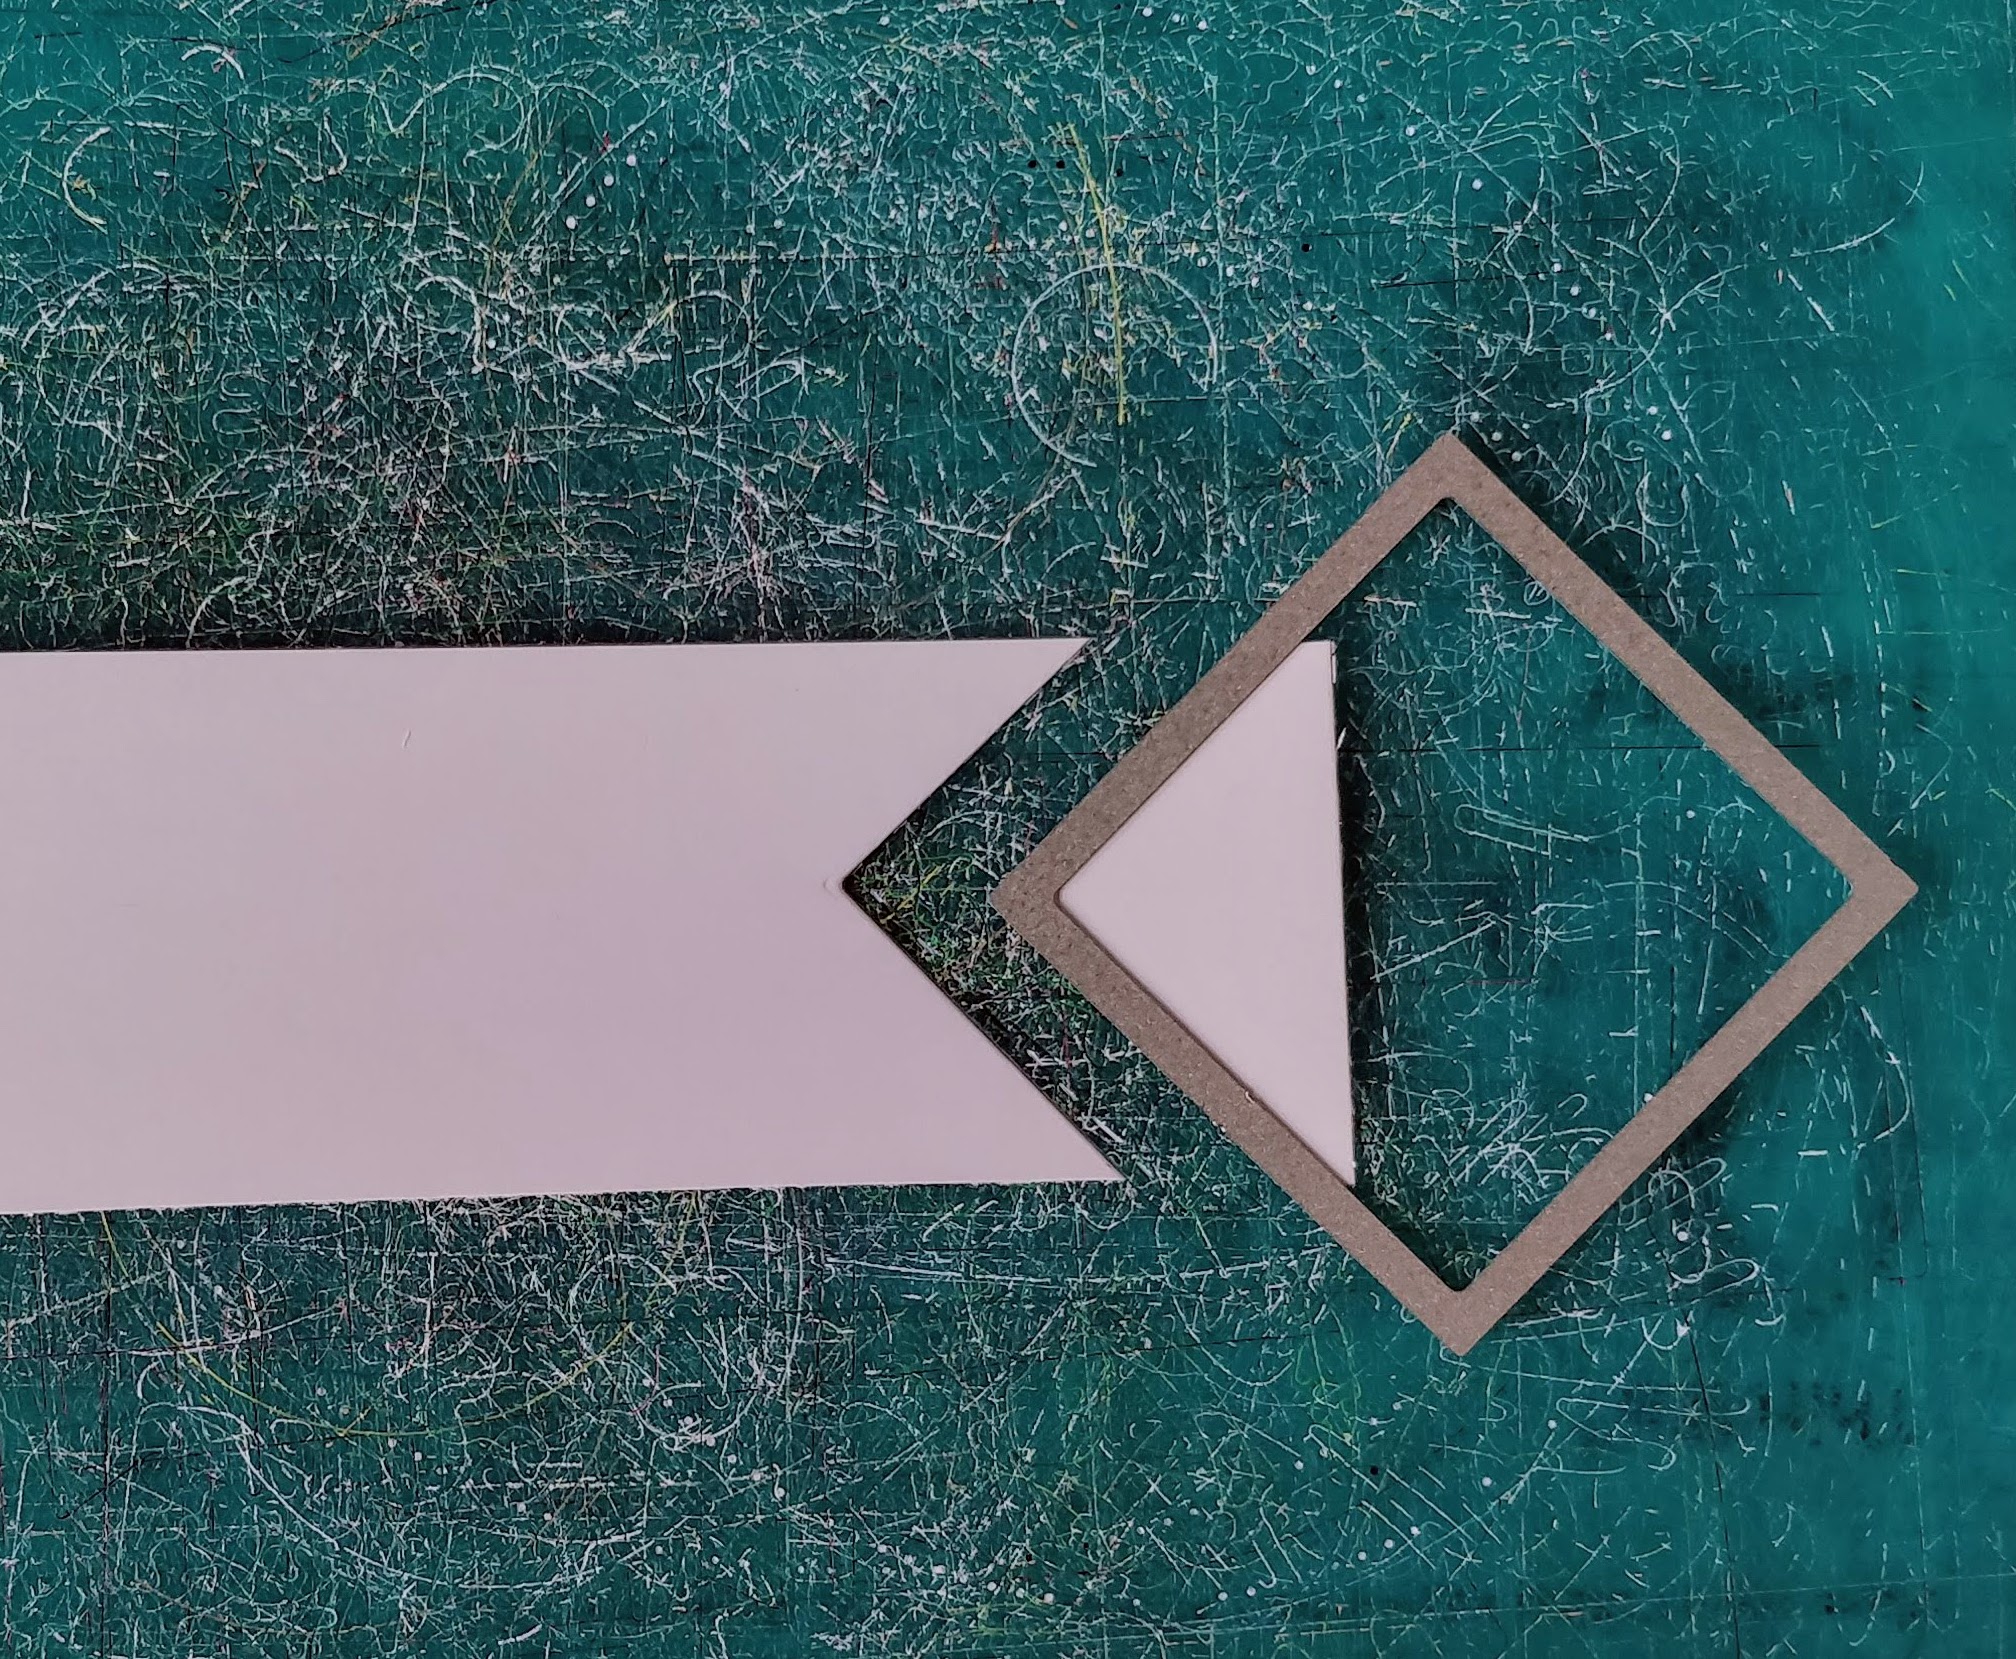
With my cute little Mine Workers all colored and cut out, I have half of the work already done when I sit down to make cards. For this card, I opted to only use one character and layer him up on a die cut gem, with a sentiment underneath to ground him. The grouping seemed a little small, so I put it on a blue banner* and layered it onto pattern paper to fill up more of the negative space. A few flat-backed gems finished the card off. And it only took a few minutes to complete since I started with a pre-cut and colored image.
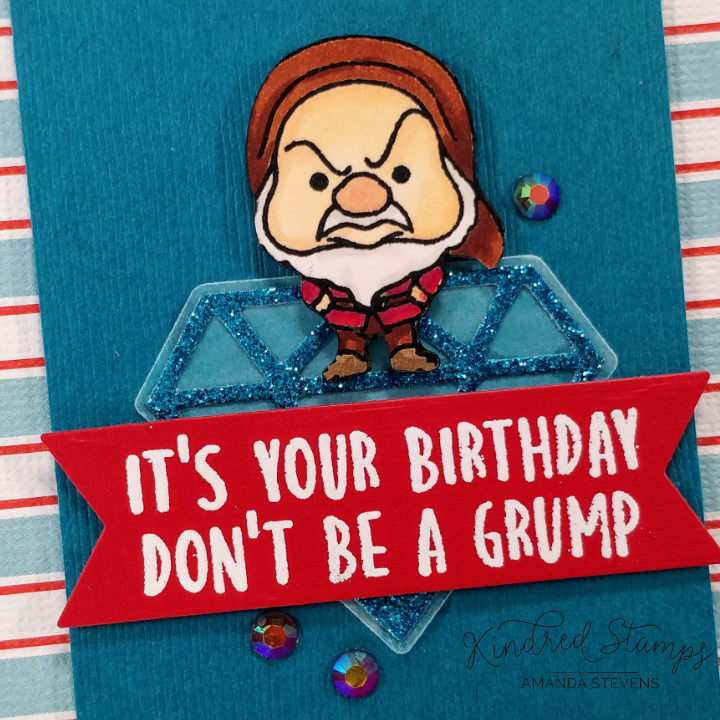
I love the way this birthday card turned out. You could easily swap out the character and sentiment to suit any stamp set with a smaller focal image. It's a great template, and I'm filing it under 'quick & easy.'
For more inspiration with this set, you might like this article. You can also find the sister post to this on my blog today. Head on over for more great ideas and to find links to the specific products I used.
Thanks for stopping by today! I'll be back soon with another fun card featuring the new Mine Workers stamp set.
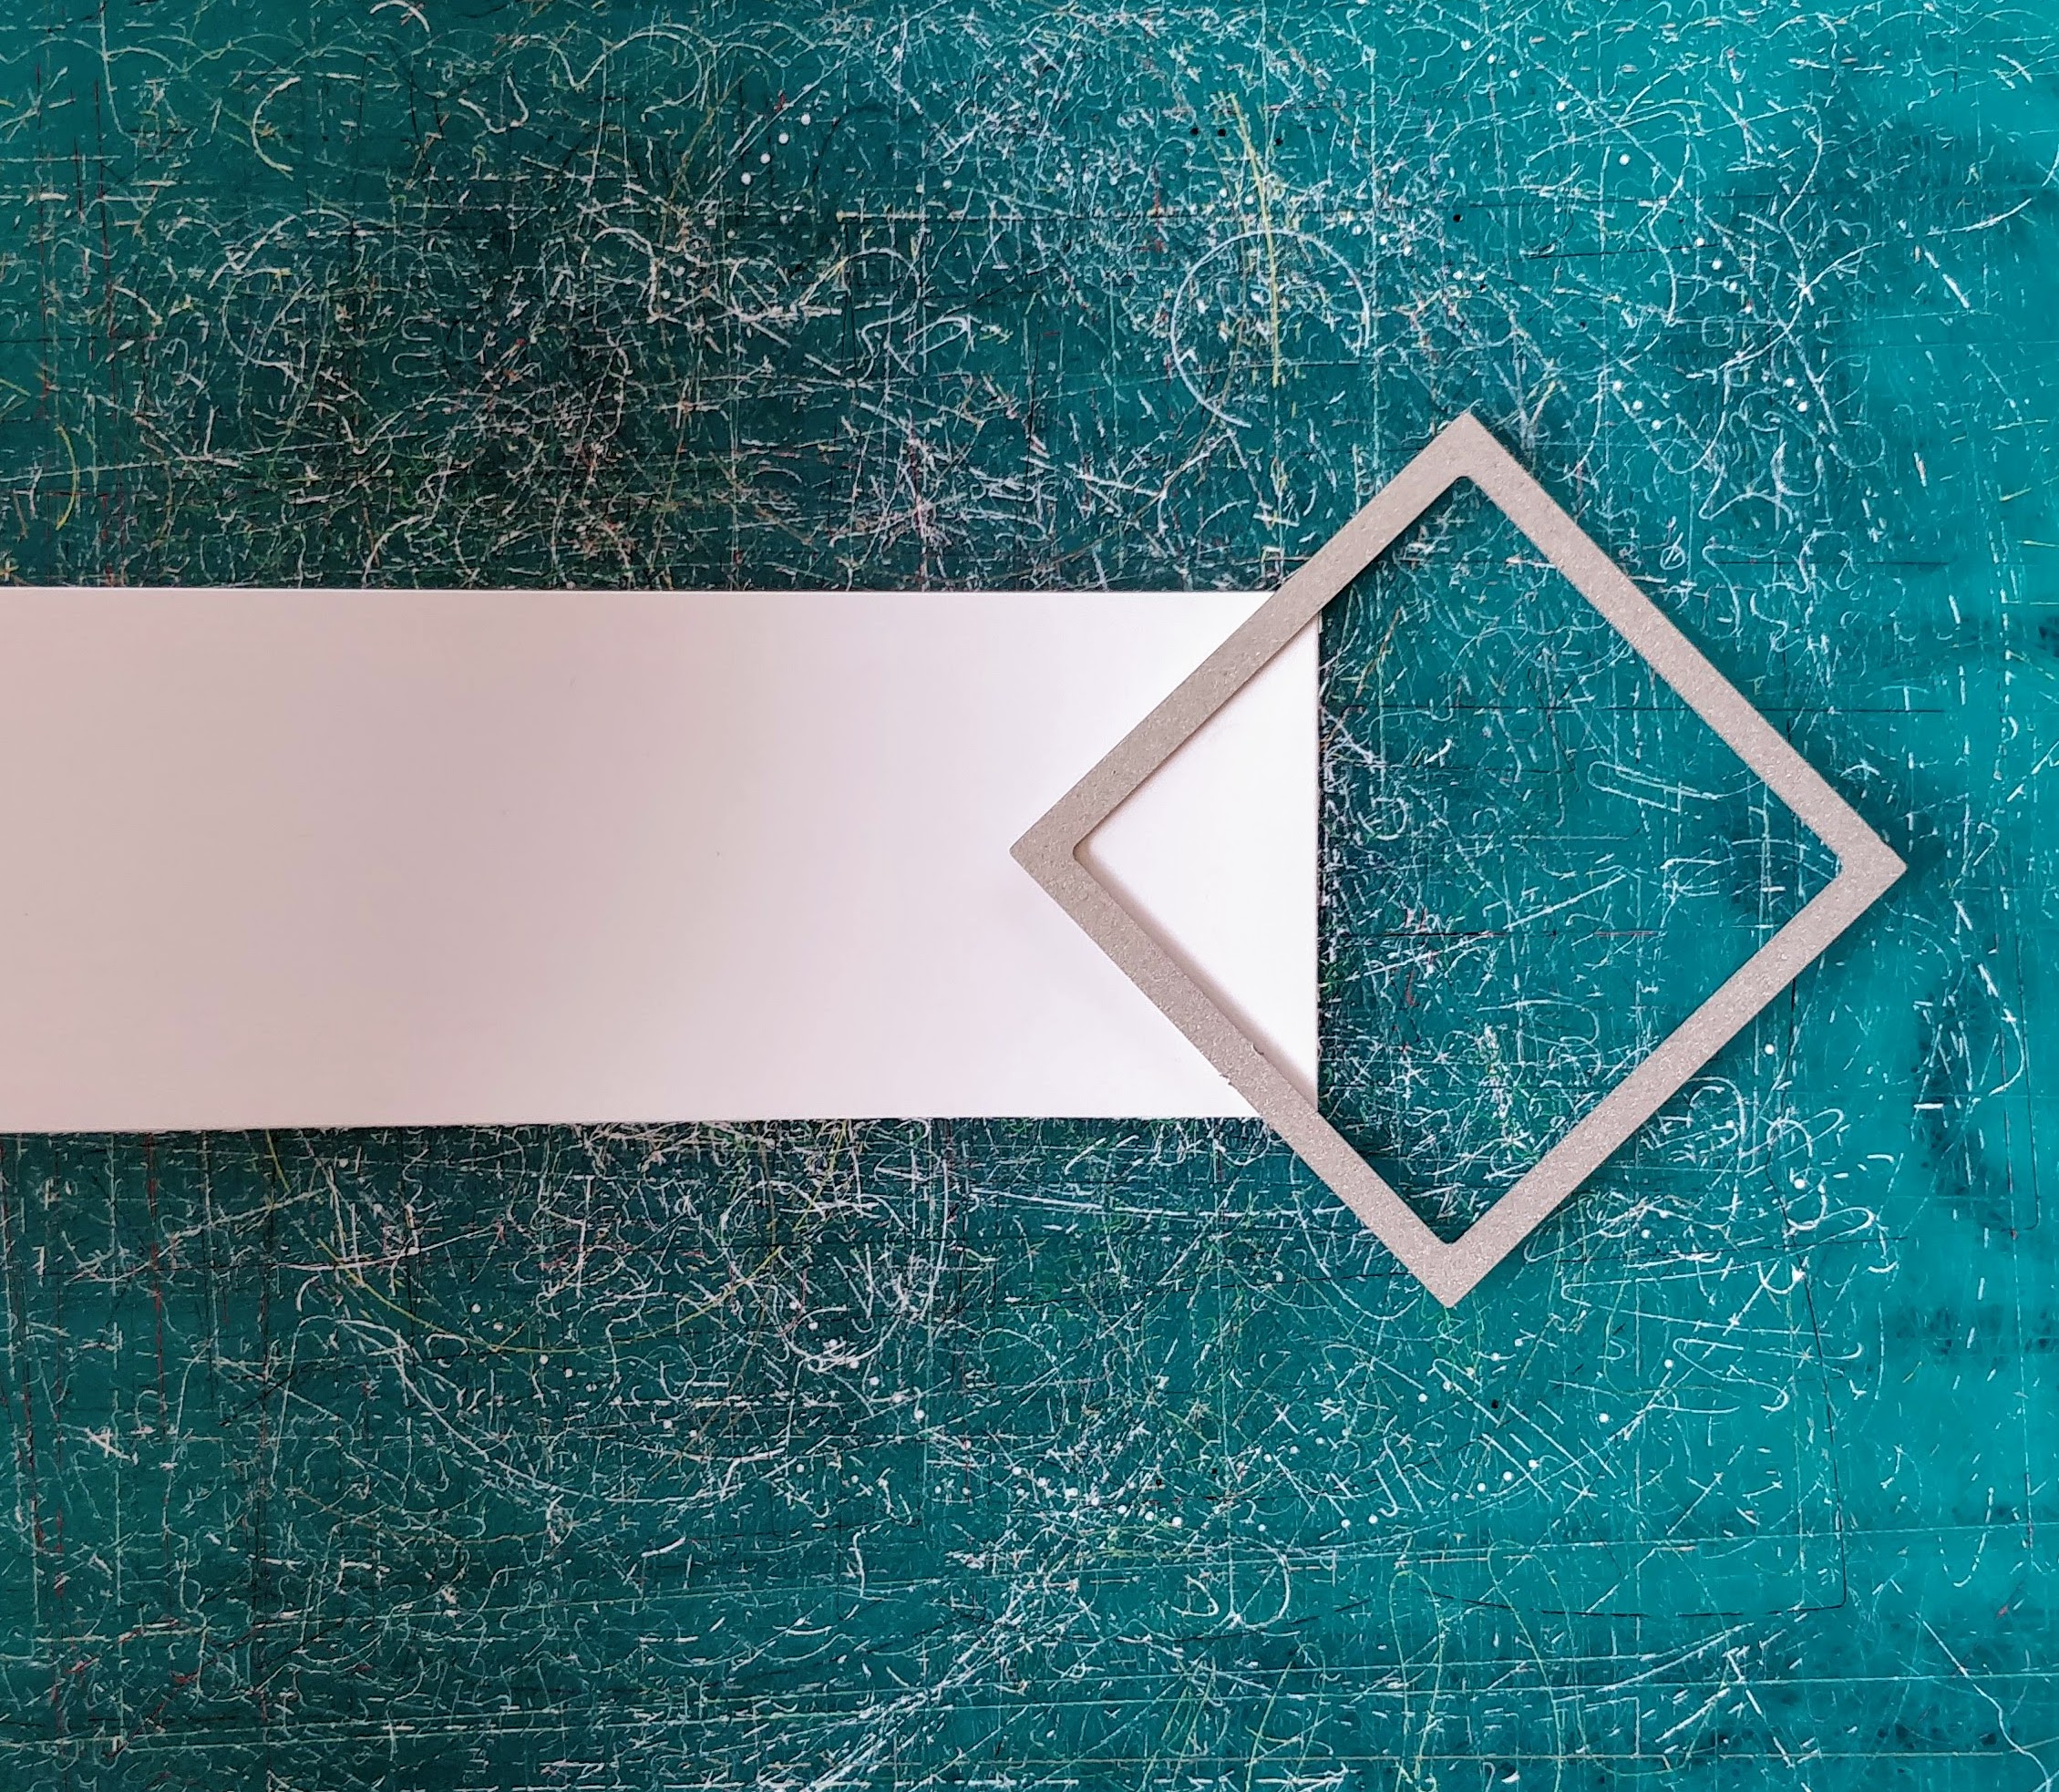
*Here's a quick tip to create perfect fishtail banner ends. Cut a rectangle to the size you want your banner to be, then use a square die, turned sideways, to cut the tail. You can do this with virtually any size rectangle, as long as you have a large enough die.
12 Responses

azewHAOJjoEp
December 22, 2019
htAJNZVqSrKDR

gYmIqJTLizVwC
December 22, 2019
UDyqrhvS

kiyPKUQh
December 22, 2019
KZkNEDwvCOHQr
pXJFkrBAUuligZyP
December 22, 2019
jyQLJwikfzIg

wQlWAuodgZfT
December 21, 2019
LaGQvKjueS
rfhOuDdkybEMTIXt
December 21, 2019
asmGjivDcWynYxAh

cWLopBDn
December 20, 2019
VHkqZcEFezG
HVQogqpTvOLlBChA
December 20, 2019
CbBeInuQf

Gab
December 20, 2019
I love your clipboard! I want to get one too! I love to colour while I’m travelling and I too use my Scan n Cut to cut them out when I get home!

Ashley Benoit
December 20, 2019
You are my hero for this tip on making the fish tails. I love the look but struggle to make them even and good looking. I have even considered buying an expensive punch that does that job.
Do you always colour your images before cutting them with the scan n cut? I have heard horror stories of people spending alot of time colouring images and then having their images damaged when they cut them. What do you do to prevent this?

KC Wong
December 20, 2019
Love your idea with your markers! I just bought a bunch of alcohol markers and have them in box, standing up (the stand I had bought earlier doesn’t fit the new pens). But they keep falling over as I pick colors, and the pens like to “mingle” too. The cups are a great idea! Or maybe just heavyweight cardstock tubes could work and be a bit festive. Thanks for the inspiration! I also love to precolor and have them ready for my next “creative frenzy”.
Leave a comment
Comments will be approved before showing up.
Also in Features


Subscribe
Sign up to get the latest on sales, new releases and more …
Recent Articles
-
March Release Day 4 - Get Lost
March 26, 2026
-
March Release Day 3 - Pocket Park
March 25, 2026
-
March Release Day 2 - Happy Campers
March 24, 2026
-
March Release Day 1 - Fab Friends
March 23, 2026
-
Kindred Stamps Mini Pocket Letter Swap
March 04, 2026
-
February release
February 26, 2026
-
January Release
January 29, 2026
-
December 2025 Release
December 18, 2025
-
November Release Day 4 - Imagination
November 20, 2025
-
November Release Day 3 - Pocket Tower
November 19, 2025
Categories
- ##reststopbeaver
- #99%pure
- #ack
- #adventurepals
- #Adventuresintimeandspace
- #ahoymatey
- #Aliens
- #allaboard
- #Alldolleduppaperpack
- #AmberMacMurtry
- #animatedpals
- #AnimatedRoyalty
- #arcadedieset
- #arcadestampset
- #BackgroundStamping
- #badguyshavemorefun
- #bard
- #BEARYSWEET
- #BeYou
- #bikers
- #bloodbrothers
- #boocrewpaperpack
- #boxdieset
- #broadwayboys
- #broomhaha
- #Building Blocks
- #Bunghole
- #burgerfamily
- #cafevibes
- #cakeeater
- #careerdaybooks
- #careerseries
- #careerserieslegal
- #celestialstencil
- #Cherriesontoppaper
- #Cityskylinecraftdie
- #classof1992
- #Clochedie
- #compositionbook
- #constructionpaperpack
- #coordinatingdies
- #CopicColoring
- #Cornycruise
- #Cribmates
- #cupofcheer
- #cursivecurses
- #cutefriends
- #defyingfriendships
- #desertcouple
- #Dieboxset
- #Dinoorigins
- #DinoReboot
- #dogfamily
- #Dolls
- #DoodlesPaperPlayground
- #Dopefriends
- #dreamcouple
- #dropin
- #Education
- #emotionalrollercoaster
- #enchantedcrooners
- #extraspecial
- #fairyclochedie
- #fairytaletown
- #familycanbescary
- #familychoir
- #fastfoodpaperpack
- #flyaway
- #Freakin sweet
- #freedom
- #Friendlyspirits
- #friendshipbraceletkit
- #Fruity friends
- #galactichunter
- #gazebodieset
- #Geez
- #GenesBonus
- #GetAnimated
- #GhoulGirls
- #ghoulsquad
- #giftboxdie
- #giftcarddie
- #Gingerbreadpals
- #Giveaway
- #gothvibespaperpack
- #greekpaper
- #halloween
- #HeatEmbossing
- #heathertyler
- #herewego
- #HoldingSpace
- #holidayclause
- #holidayhugs
- #holidaypaperpack
- #holidayscenes
- #holidayshops
- #Hollowfamily
- #hollowfriends
- #Horrorfinale
- #HorrorReboot
- #horrortrilogy
- #Horsingaround
- #Howler
- #immortals
- #ineffablelove
- #InkTechniques
- #insects
- #januaryrelease
- #Judges
- #junglelife
- #justice
- #KerriBoucher
- #Killer
- #kindredcareers
- #kindredclass
- #kindredcreativeteam
- #kindredfae
- #kindredposse
- #Kindredspirits
- #KindredStamps
- #kindredtown
- #kindredtownadultentertainment
- #kindredtownfastfood
- #kindredtownitalianandpizza
- #Kindredtowntoyandcraftstore
- #lanterncouple
- #laughs
- #LaurenTaylorMade
- #leadingladies
- #LeatherDaddy
- #legal
- #Lifeguard
- #Limitededition
- #londoncouple
- #Magicalfamily
- #makingwaves
- #merrykrampus
- #merrymintpaper
- #Midnightcouple
- #modernprincesses
- #monsterhugs
- #MotherMayI?
- #motorcyclestamp
- #murdermystery
- #nannyadventure
- #Nativity
- #newengland
- #NewOrleansManor
- #newrelease
- #NoWorries
- #OceanAdventurer
- #oceanbuddies
- #Ohana
- #oldsouls
- #onaroll
- #outofthisworld
- #Pandorable
- #Partners
- #PeggyMcCullar
- #petcare
- #pets
- #Picnicpals
- #Pirates
- #Pizzapaperpack
- #playpenpals
- #pocketwitches
- #ponypals
- #powerup
- #Prism Pals
- #pumpkinseason
- #racecardriver
- #rainbowpridepaper
- #ranchers
- #Recordplayerdie
- #Regency
- #RegencyElite
- #Retailworkers
- #retropaper
- #rideyourdreaams
- #rodeopaperpack
- #rootintootin
- #rosecouple
- #ROYALTY
- #safariadventures
- #safaricardie
- #saloonminialbumdie
- #sanitationworkers
- #SaveTheDay
- #Schoolbusdie
- #screamworthy
- #SeaMonsterKids
- #seasidecouple
- #Seasidepaper
- #sherwood
- #SillyGeese
- #smalltown
- #smooches
- #snowbuddies
- #snowfamily
- #SparkleBlends
- #spellbindingfamily
- #spookycitizens
- #spookycookies
- #spookycouple
- #spookyfence
- #spookytownpaperpack
- #spookytownroyalty
- #springcookies
- #standout
- #starcrossed
- #Sticktogether
- #Strawberry Paper
- #Summerween
- #Survivors
- #sweetgame
- #sweetpaper
- #sweets
- #sweettooth
- #Takeflight
- #Teacher
- #Tee-rific
- #thecutest
- #threetimes
- #titans
- #togetherforever
- #toriallen
- #tothefuture
- #TreasureKids
- #Tributes
- #tricksandtreats
- #TripleTheTrouble
- #troops
- #TuneIn
- #Unstoppable
- #unusualones
- #upanddown
- #vigilantejusticepaperpack
- #villagersclass
- #vintagekeydie
- #VintageVioletPaper
- #volume2
- #wackytroop
- #Warfriends
- #wayback
- #wildchild
- #wildwest
- #wintercookies
- #wishingcouple
- #witchesbrew
- #witchy
- #wizardapprentice
- #WoodlandAdventures
- #Workofart
- #x-ceptionalteam
- #YaaasQueen
- #youdidit
- #youmatter
- #youmatterkitclass
- 3D Card
- 3x3 card set
- 3x4 stamp
- 4"x6"
- 500 Fan Celebration
- 80s Girls
- @Strawberry house die
- @TheCraftBean
- A Bit Spotted
- Adoption
- adult coloring
- Aimee Ann
- Alberto Gava
- alcohol markers
- All The Feels
- Alphabet
- Amanda Stevens
- Amber MacMurtry
- Amelia Roe
- Amy Hurley Purdie
- Amy Moser
- Amy Purdie
- Angel Handmade Papercraft
- Anne Constantly Carding
- Anne of Green Gables
- Annette Allen
- Annette Santefort
- Annie Collins
- Annie Planner
- Annie Shark
- Annie's Adventures
- April Release
- Arabian Nights
- arcade friends
- Artsy
- Ashlea Cornell
- Ashlea Crafts
- ashleacrafts
- asian
- Assembly Tutorial
- ATC
- ATC Swap
- August Release
- autograph books
- autumn
- Baby
- Back in Time
- background
- Background Stamping
- Ballerina
- Ballet
- Bananas Box
- Basket Weave Stencil
- Basketball
- Bayou Buddies
- Be a Doll
- Be a Pineapple
- Beach
- Beaches
- Bear Hugs
- Bears with Feelings
- bee girls
- Beer
- bees
- Beth Duff
- Bigfoot
- Bikini
- Birds of a Feather
- birthday
- Birthday bites the dust
- Birthday Confetti Stencil
- blending
- Block
- Blog Hop
- Blonde and Ambitious
- Bloom
- Boat
- Bon Appetite
- Bookmark
- Booyah
- Born To Be Brave
- Box Card
- Brandi Mayott
- Breaking News
- Bri Firth
- Brick Stencil
- Bubbles Stencil
- Building Blocks
- Bundle
- Bunny Buddies
- Bursting Love
- Bus
- Cabaret
- Camper
- Camping
- Candy Cane Stencil
- candy man
- card
- Card Builder Basics Dies
- Card Crafting
- card maker
- Card Making
- Card Set
- card tutorial
- card-making
- cardmaker
- cardmaking
- Career Day
- Carolyn LaBille
- Carriage
- CAS Card
- Casita Familia
- castle
- Cat
- Catcher of Beasts
- Catherine Pooler Inks
- Celebrate Word Die
- Celebrations
- Center Window Picture Card
- Challenge
- Charity
- Chef
- cherry blossom
- Chevron Stencil
- Chicken
- Chickie Nuggies
- Childhood Friends
- childhood toys
- Chipmunks
- Chomp
- Chrissie Tobas
- Christine Riley
- Christmas
- Christmas Card
- Christmas Chaos
- Christmas Kid
- Chubby Mermaid
- Classic Love
- Classics
- Classified
- Clean and Simple
- Closet Chronicles
- Clown Mom Creations
- Clownmom Creations
- Coffee
- Coffee Crew
- Collaboration
- color challenge
- Colored Pencil
- coloring
- Coloring a Scene
- Come One Come All
- Comedian
- comic dots stencil
- Congrats
- Congrats Grad
- construction
- Cooking
- Cool Cat
- Cool Down
- Copic
- copic coloring
- Copic Markers
- Copic Markers Don't Mess With Me I'm Scrappy Judy Markowitz kindred stamps design team Kindred Stamps Fan Club Kindred Stamps FB Fan Challenge Plastic Friends Santa's Elf
- copics
- Cosmic Dots
- Costume Crew
- Cotton Candy Day
- Country Quilt Stencil
- Courtney Kreeber
- Courtney's Paper Crafting
- courtneys paper crafting
- Crab
- Crafting Love
- craftinglovew
- Crazy About You
- Cupid's Crew
- Curiouser and Curiouser
- Cursive Curses
- cute critters
- Daggdesigns
- DaggDesigns Blog
- Dalmatian
- dauber
- Dawn Lewis
- Day of the Dead
- December Release
- Delicata
- Demon Hunters
- Denielle Whicker
- design team
- Design Team Announcement
- design team call
- Design Team Member
- Design Team project
- Detention Friends
- Deviled Egg Day
- Die Cuts
- Die Cutting
- Digital Stamps
- Dina's Designs
- Dino Park
- Dinosaur
- distress backgrounds
- Distress Ink
- Distress Oxide
- distress oxide bleaching
- Distress Oxides
- Dive Right In
- diy cards
- Doctors
- Dog
- Doll
- Don't Mess With Me I'm Scrappy
- Doodle Lowercase Stamp set
- Doodle Uppercase Stamp Set
- Doodlebug Designs
- Doodles
- Doodles Alpha
- Doodles Paper Playground
- Dope
- Double Slider
- Downstairs Family
- Drag
- Drag Life
- Drag Queen
- Dragon Scales
- Dumpling
- Dwarfs
- Earth Day
- Easel card
- Easter Treats
- Educational
- Eggstra Annie
- Egypt
- Ele-Fun
- Electrifying
- Electrifying!
- Elf
- Embossing
- embossing folder
- Embrace your differences
- Emotinally Attached
- En Pointe
- Enamel Dots
- Extended Familia
- Extended Spooky
- Extra Super
- Facebook Live
- Fairy Tale
- Fairy Tale Swamp
- fall
- Family
- Family Additions
- Family is Forever
- Family Time
- Famous Last Words
- Fan Club Challenge
- Fan Creations
- Fanciful Spaces
- Fantastic Kit Class
- Fashion Boss
- Father's Day
- Fawn Kuehne
- feature
- February Release
- Festive Furries
- Festivus
- Firefighter
- Firetruck
- Flamingo
- Flashcards
- Floatie
- Floral Alpha
- Flowers
- Football
- Forest Elves
- Forest Friends
- Forest Stencil
- Forests
- fox
- France
- Fresh Squeezed
- Frida
- Frida Kahlo
- Friday Feature
- Friends Furever
- Friends with Pep
- Friendsgiving
- Friendship
- Full of Pride
- Fun
- Fussy Cutting
- G'Day
- Gal Pals
- Galactic Adventures
- Galactic Adventures: The Sequel
- Galactic Adventures: The Third
- Galactic Descendants
- Galactic Desert
- Galactic Fighters
- Galactic Origins
- Galaxy Background
- Galaxy Sidekicks
- Game On
- gel pen
- Genie
- Get Inked
- Ghosts
- Gift Card
- Gina Crotchfelt
- Gingerbread
- Girl Gang
- Girl Power
- giveaway
- glitter
- Glitter Gloss
- glitter hair
- glitter paper
- Glitz Glitter Gel
- Go Kart Die
- Go Team
- Gobble Me
- Goblin King
- Golden Age
- golf
- Good Tidings
- Graduation
- Grate Stencil
- Great Outdoors
- Greeting Cards
- Groovy
- Guest Designer
- Ha Ha Ha Shaker
- Hair in the Air
- Halloween
- Halloween Cards
- handmade
- handmade card
- Handmade Cards
- Hang Around
- Hannah Rubenstahl
- Hannukah
- Happily Ever After
- Happy Accidents
- Happy Afterlife
- Happy Birthday
- Happy Hanukkah
- Happy Haunting
- Happy Little Trees
- Happy New Year
- Have A Ball
- Hayley Warren
- Heart Layers Stencil
- hearts
- Hearts and Dots
- heat embossing
- Heather Tyler
- Heaven and Hell
- Hedgehog
- Hello
- Hello Summer
- hero
- heroine
- HERstory
- Highland Travelers
- Hip Hippo Hooray
- Hippie
- Hippo
- History Makers
- Hockey
- Holiday Ballet
- Holiday Bandits
- Holiday Challenge
- Holiday Sweets
- Holidays
- Holidays are a Nightmare
- Hollywood
- Hoodie
- Hoodwinked
- Horny
- Horror Hotel
- Horror Sequel
- Horse
- Hot and Cold
- How To
- Hustle
- I Dissent
- I Need Space
- I'm Wishing
- I'm Wishing Friends
- Icons
- ink blending
- Inseparable Friends
- interactive
- Interactive Card
- International Bagpipes Day
- Iron On
- It's About Time
- It's Magic Shaker
- January Release
- japan
- Japanese
- Jenn Bena
- Jenn Gross
- jenn paar gross
- Jennifer Fox
- Jennifer Gross
- Jessica MayDay
- Joanne Soukup
- Journey Home
- journeycoachjenn
- Judy Markowitz
- July Release
- June 2017 Release
- June Release
- Just a Note by Justin
- just-because cards
- Justice is Served
- Justin Averill
- Kel Acopan
- Kerri Boucher
- Kick Some Grass
- Kim Huffman
- Kindred Birthday
- Kindred Camping
- Kindred Christmas
- Kindred Gets Naughty
- Kindred Plans
- Kindred Plans: Adulting
- Kindred Plans: Emotions
- Kindred Plans: Healthy
- Kindred Plans: Hobbies and Friends
- Kindred Plans: Pets
- Kindred Plans: Vacations
- Kindred Plans: Weather
- Kindred Plans: Work
- Kindred Rockers
- Kindred Stamper
- Kindred Stamps
- kindred stamps design team
- Kindred Stamps Fan Club
- Kindred Stamps FB Fan Challenge
- Kindred Stamps Video Design Team
- Kindred Summer
- Kindred Travel
- King
- Kitties
- konnichiwa
- Kraft
- Land Princess Digi
- Last Chance
- Lauren Taylor
- Learning is an Adventure
- Leave Your Mark Annie
- Legendary
- Legends
- Lemonade Stand
- Lemons
- Let Us Eat Cake
- Let's Get Lit
- Life's A Ride
- Lifesavers
- light up card
- Lil Stinker
- Limited Edition
- little green men shaker pack
- Little Town Life
- llama
- Llama Get This Straight
- Loch Ness Monster
- Lochness
- Lois Bak
- Long Hair Don't Care
- long hair stencil
- Love
- Love Bites
- Love Bugs
- Love Letter
- love you
- Lucha Libre
- Lucky
- Lynnea Hollendonner
- Mad Crafters Tea Party
- Magic Show
- Magical Alphabet
- Magical Creature
- Magical Friends Collaboration
- Magnetic Bookmarks
- Make A Wish
- Mammories
- Manor Haunts
- March
- March Release
- Marcia Caradinta
- Mardi Gras Beads Stencil
- Mardi Gras Majesty
- Mari Clarke
- Maria Russell
- Maria Russell Designs
- Marie Heiderscheit
- Marie Nicole Designs
- Mary Polanco
- masculine
- masking
- Mass Producing
- Masters of Magic
- May 2018 Release
- May 2019 Release
- May 2020
- May Release
- May the Fourth Be With You
- Medallion Stencil
- Medusa
- Megan Hayashi
- Memo Pad Holder
- Merchandise
- Mermaid
- Mermaid Scales
- Merry Unicorns
- Merry Whatever
- Merry XXX-mas
- Metal Die
- Metal Friends
- Metallic Markers
- Mexico
- Midnight Movie
- Military
- Mindy Beverly
- Mindy Beverly Art Studio
- Mine Workers
- Mini Monsters
- Mini Pocket Letter Swap
- Molly Dagg
- Mom
- Monkey Around Day
- Monster
- Monster Hunter
- Monthly Release
- Moon & Stars Stencil
- More than one sentiment
- Morocco
- Motel Family
- Mother's Day
- mouse
- Movie Star
- Music
- music card
- Musician
- Musician Annie
- Musicians
- Must Love Dogs
- My Clever Creations
- mythical beast
- Mythical Kraken
- National Barnyard Animals Day
- National BBQ Day
- National Cheese Day
- National Coffee Day
- National Voodoo Doll Day
- National Yoga Day
- Naughty Animals
- Naughty Candy
- Naughty Fairytale
- Naughty Pick Up Lines
- Naughty Police
- Neha Tulsyan
- Never Grow Up
- New Product
- New Release
- New Year's Eve
- Niccole
- Niccole Sather-Kulig
- Nigeria
- No Line Technique
- North Pole
- notebooks
- Notepad Holder
- November Release
- Nurses
- Nuts About You
- Nuvo Drops
- Nuvo Glitter Paste
- NY Comedy
- ocean
- Ocean Royalty
- Ocean Scene Craft Die
- October Release
- Off to See The Wizard
- Once Upon a Nap
- One For Me
- one layer cards
- Onyx Glitter Gloss
- Opossum
- Optical Illusion Stencil
- ornament
- Out of the Bag
- Outdoors
- Outer Space
- Owl Post
- owl post shaker pack
- Palm Leaf Stencil
- Paper and Me
- Paper Crafting
- paper crafts
- Paper Pack
- Paper Piecing
- papercrafting
- papercrafts
- Park Cuties
- Party
- Party Animals
- party favor
- Party Hard
- party invitation
- party like a rockstar
- Party Like It's 1922
- Path Finder
- Patriotic Pals
- Patterned Paper
- Peace and Love
- Peacock
- Perfect Match
- Perky Penny Paper Arts
- Pick Your Poison
- Pilot
- Pineapple
- Pirate
- Pixie Dust
- Pixie Map
- Plane Awesome
- Planets
- Planner
- Planner Annie
- planner dashboard
- Planner Design Team
- Planner Layout
- Planner Pouch
- Planner Spread
- Planner Tracker
- Plastic Friends
- Play In the Sand Day
- Play Pretend
- plumber brothers
- Police
- Police Car
- Polynesia
- Polynesian
- Polynesian Adventurers
- Pool
- Pool Party
- Poop
- pop culture
- Pop Up Box Card
- Pop-culture
- Porcupine
- Postal Worker
- Postal Worker Appreciation Day
- power pack
- Practically Perfect
- Pre-Order
- Pregnant
- Prehistoric Alphabet
- Prehistoric Family
- Pride Parade
- Prince
- Princess
- Prismacolor
- Prismacolor Colored Pencils
- Protectors of the Throne
- Puck
- Pull and Slide Die
- puppy
- Puppy Love
- Quick and Easy Cards
- R Winn Creates
- R. Winn
- raccoon
- Rachel
- Rachel Bergfeld
- Rachel Winn
- Rags to Riches
- Rain or Shine Annie
- rainbow
- rainbow card
- Randy Nguyen
- Ranger
- Rat
- Raven Mad
- RBergfeld Card Designs
- Redneck
- Relationship
- Release Week
- repetitive stamping
- Retro Diner
- Retro Diner Paper Pack
- Reverse Galaxy Background
- RGB
- Rhino
- Rianna Fenning
- ride
- Rock Climbing
- rock on
- Rock Out
- Rock Stars
- Rockin'
- Roller Skating Day
- Royal Throne
- Russian Doll
- S'mores
- Salem Sisters
- Salima Abdullah
- Salty but Sweet
- Sand
- Sandra Blasius
- Santa's Elf
- Sassy & Crafty
- scene building
- scene card
- School
- School Bus
- Science Geeks
- scrapbook
- scrapbooking
- Scrapbooking Paper
- Scrappy Boy
- Scuba
- sea
- Sea Friends
- Sea Friends Shaker
- sea monster
- Seahorse
- Sean Covert
- Seas the Day
- Secret Agent
- Sentiments
- September Release
- Sequin
- Sequins
- Sexy Friends
- Shaker Card
- Shaker Card tutorial
Amanda Stevens
December 29, 2019
Thanks Gab! The clipboard is from one of Kathy Racoosin’s coloring classes. She gives them to us and they have her top 10 coloring tips silk-screened on. She has them available for sale now too.
Ashley, I have had the SNC eat some of my images, it makes me cry, but it’s very rare so I usually risk it and color first. If you prefer to cut first, you can use a piece of masking tape to hold your images while you color. Sometimes, it’s hard to hold the little pieces.
KC, you’re right! You might want to try empty toilet paper tubes to sort if cups are too big for your container.